
 There is not much information published online about the Fotochrome camera. I never thought I would come across one until I stumbled upon an Ebay sale. The seller had about 10 'new' cameras selling for $7 each plus shipping. I knew the camera was a tough cookie to convert. It has a fixed ISO setting of 10. It requires a proprietary paper film format with spaced out sprocket holes that enable a film registration pin for film advance and it doesn't match up to 120 film size, but it is close... and that is what matters! I read through a few blog posts, forum posts and Flickr discussions. One particular post was Nano_Burger's instructable. His photos posted on his Flickr page really sold me. I figured with a little work, I could probably - and quite easily - convert this thing to use 120 film. With that understood, I hit the 'buy it now' button.... and here is how it went:
First things first... I taped up the film registration pin. Gaffer's tape or Duck tape will do. Just make sure the adhesive isn't exposed on the side. If it got onto your film, it could be quite messy and ruin your negatives (or entire film) during the developing process. Using tape has worked great so far. It enables the pin to push out which cocks the shutter, but it doesn't interfere with advancing the film.
 |
| Here I used Gaffer's tape. |
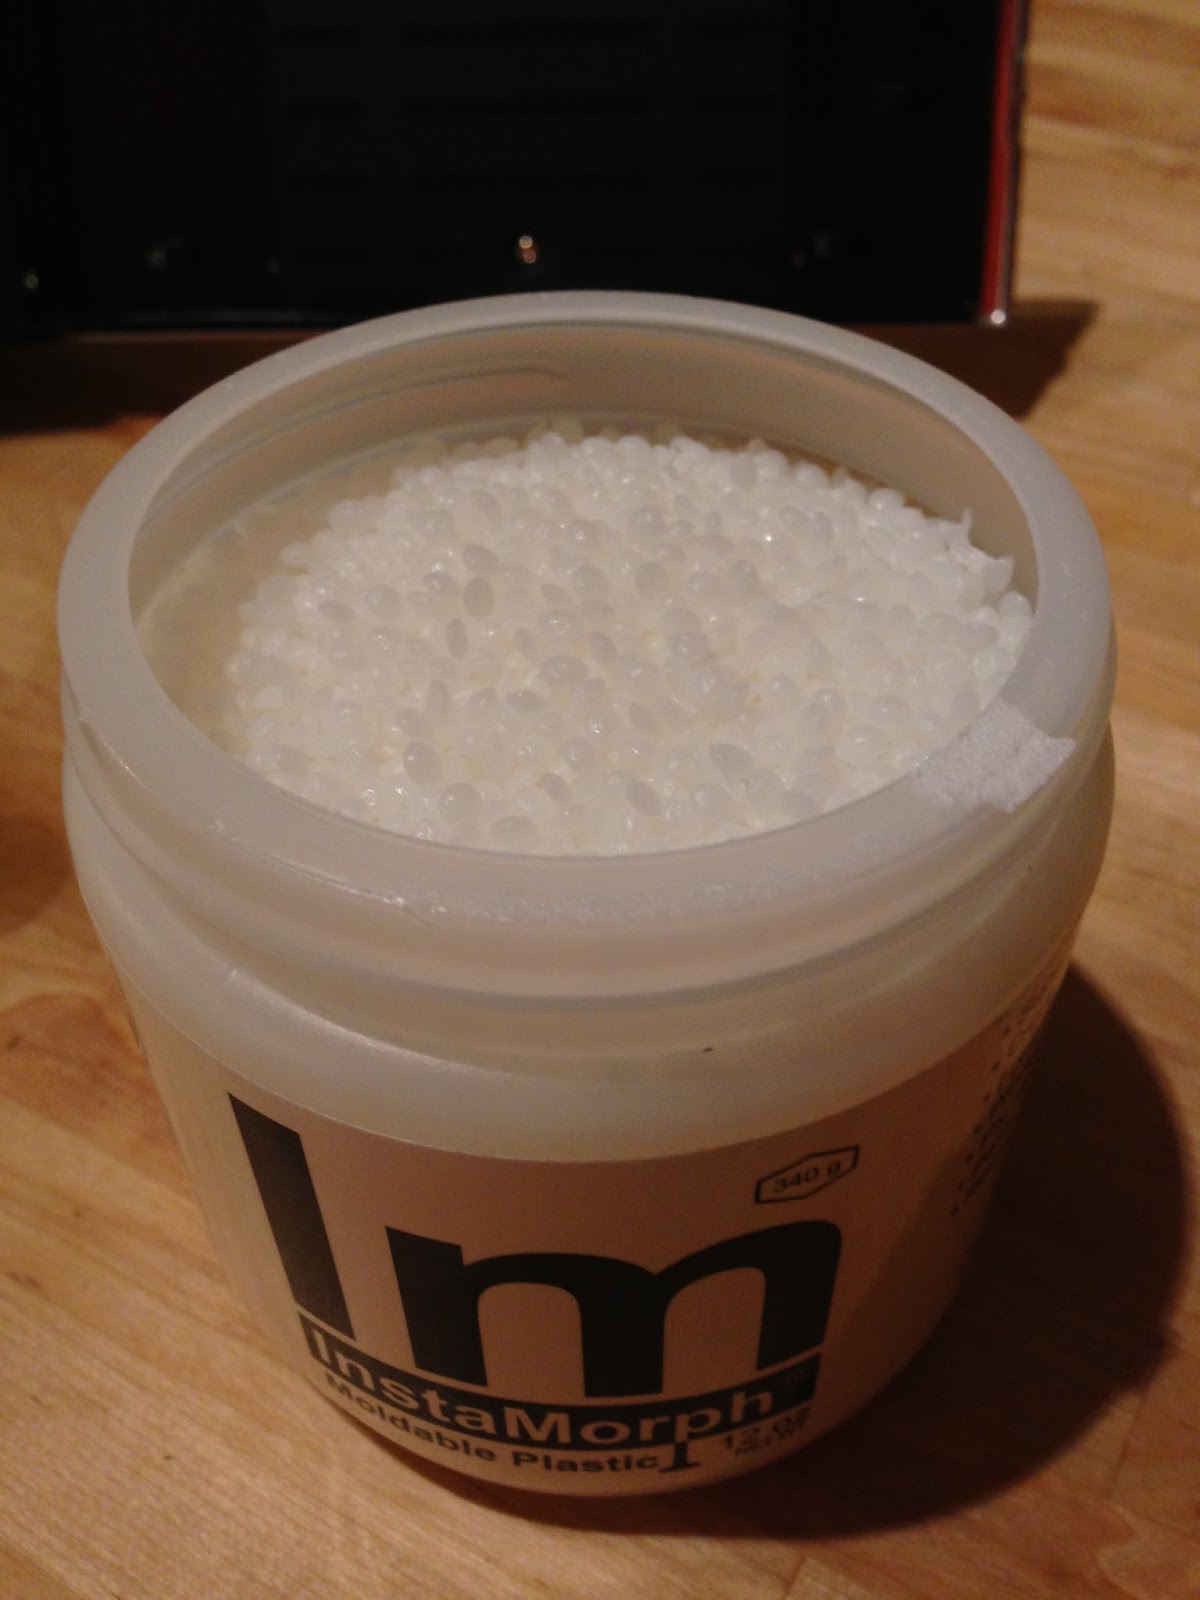


It took me a few tries to really learn how to work with it. But after the 4th mold, I had it down. I created a top and bottom adapter. The top was a bit thinner since it didn't have to engage a gear, but in the end this what I came out with. When completely cooled down, it gets white and much harder. It is also very rigid.


After that, I glued a piece of foam to the back of the door to keep pressure on the film spool. It is ok to have the film spool 'float', but it will need some pressure to keep it in place. Even weather stripping will do.


Now, we need to deal with the 10 ISO feature. This is not such a hard hoop to jump through. You can shoot any 100 ISO and pull process a little bit or just develop as is. You can also shoot with Ilford's PAN F B&W 50 ISO film. I haven't tested this, but it is so close it shouldn't matter. Here are some samples of photos by Flickr user nano_burger that were shot using 100 speed film.
 Finally... it's time to figure out the film advance. I will not be using the current mechanical pin registration system. That has been bypassed with the previous taping method. It will be done old school by counting the turns. Just like putting 35mm in a holga. To do this, I lined up an old roll of exposed film that has been sacrificed - just use an old expired film or cheap roll of Shanghai. I lined up the film arrow to the start of the film spool (not take up spool), and counted the turns from there to the where the first exposure would be on the film.
Here is what I have worked out. I still need to tweak these numbers:
Line up arrow with spool.
Close door.
Turn 8 - Exposure 1
Turn 2 - Exposure 2
Turn 1 3/4 - Exposure 3
Turn 1 1/2 - Exposure 4
Turn 1 1/2 - Exposure 5
Turn 1 1/2 - Exposure 6
Turn 1 1/4 - Exposure 7
Turn 1 1/4 - Exposure 8
Turn 1 - Exposure 9
The camera even has a film counter that you can manually turn to keep track of your exposure count.
.JPG)
And here are the results! I ran a roll of Ilford Delta-100 Pro Black & White Negative Film (ISO-100) through as a test and the results were amazing for this camera. Take into consideration that this is basically an 'instamatic' style point and shoot 120 camera....


that tricycle photo is fantastic!
ReplyDeleteHi Stephen! Love your walk through! I am working on a review for the Fotochrome and am not brave enough to attempt this mod myself. I wanted to include a sample image of what the camera is capable of and wanted to know if I could use your tricycle image as a sample? My site is not for profit and is educational only. I'll give you full credit and a link back to your post. Please let me know if this is OK. -Mike
ReplyDelete